Tara Brawl Stars Guide (2025): Abilities, Strategies, Best Builds & Tips

Introduction
Tara is a powerful Mythic Brawler in Brawl Stars, Supercell’s popular mobile MOBA shooter, known for her crowd-control abilities and burst damage. In this Brawl Stars Tara guide, we will cover everything from her origin and core stats to her main attack and Super. Whether you’re a beginner learning how to play Tara or an advanced player seeking expert tips, this guide will help you master her. You’ll learn how to use her unique Triple Tarot attack, unleash her gravity-well Super, and leverage her Star Powers and Gadgets for maximum impact. We’ll also discuss the best build for Tara, including recommended Gears, team compositions that complement her playstyle, and even her skins and customization options for style. By the end of this article, you’ll have a full strategy and build plan that highlights Tara’s strengths across all levels of play.
Who Is Tara? (Background)
Tara is one of the Mythic Brawlers in Brawl Stars game, introduced in late 2017. Her theme is based on mysticism and tarot cards – she looks like a fortune-teller and fights with enchanted cards. In the game’s lore, she’s a mystical fighter who predicts the future with cards and uses her dark magic in battle. Tara is classified as a Fighter-type brawler, meaning she has moderate health and balanced damage. She isn’t as tanky as frontline brawlers like Bull or El Primo, but she’s tougher than fragile sharpshooters.
In gameplay, Tara excels at mid-range dueling and area control. Her mystic theme is more than cosmetic: her attack throws three tarot cards and her Super creates a black hole, both giving her unique mechanics. As a Mythic rarity, Tara is relatively rare and hard to obtain (from Trophy Road or high-tier rewards). She’s a rewarding pick for players who enjoy strategic play. Tara often acts as a supportive assassin on her team: she can weaken groups of enemies with her Super and finish them off with her attack. Overall, her background story and design make her a memorable and versatile brawler in the Brawl Stars roster.
Tara’s Stats and Overview
Tara’s base stats place her squarely in the medium category. At level 1, Tara starts with around 3100 health, and at max level (10) she has roughly 5890 health. This is a moderate amount – she can survive some hits, but she’s not as durable as a true tank. Tara’s movement speed is normal, letting her reposition at a decent pace.
Key attributes of Tara’s kit:
- Attack Range: Long (8 tiles). Her Triple Tarot cards can reach far, letting her poke enemies from a distance.
- Damage: Each card does moderate damage. At max level each card hits for ~960, so a full three-card hit is ~2880 damage.
- Reload Speed: Slow (about 2.0 seconds). Tara fires all three cards then reloads. This means every attack costs significant downtime, so she must make each shot count.
- Class: Fighter (in Brawl Stars terms). She deals decent damage up close but has limited burst against high-health tanks. She pairs well with teammates who can finish targets.
Tara is all about spread damage and area control. Her three-card attack has a slight spread pattern (25°). Up close, all cards land and damage is maximized. At long range, the cards scatter and often only one or two cards will hit a single target. Thus Tara deals most damage at medium-to-close range. She uses her moderate health pool to get in position and her slow reload to punish mispositioned foes.
Her Super, Gravity, is a short-range black hole. This ability pulls enemies together and can wipe out clusters of enemies when used properly. Tara’s general playstyle: use cover and positioning to land her cards, then deploy her Super to catch groups of enemies. She excels in 3v3 team modes where enemies often bunch up.
Tara’s Main Attack: Triple Tarot
Tara’s primary attack is Triple Tarot. When Tara fires, she throws three purple tarot cards in a single volley. Each card travels straight forward and pierces through enemies and obstacles. The cards start together but fan out as they fly.
This attack has important characteristics:
- High Close-Range Damage: If all three cards hit a target (or multiple targets close together), Tara deals massive burst damage. Up close, three cards can hit the same enemy or multiple enemies, delivering a powerful hit.
- Long-Range Reach: With an 8-tile range, Tara can poke enemies from afar. However, at maximum range the cards spread out widely, so usually only one card will hit, dealing much less damage.
- Piercing Effect: The cards go through enemies. Tara can line up shots to hit a pack of foes, or hit one enemy with multiple cards by angling correctly.
- Slow Fire Rate: After firing three cards, Tara needs about 2 seconds to reload. During this time she’s vulnerable. It’s crucial to make shots count and retreat if she empties her ammo.
Key Tips for Triple Tarot:
- Aim for Choke Points: Fire when enemies are grouped in narrow spaces (e.g. between walls or in bushes) to maximize card hits.
- Close the Distance When Safe: If you have support or cover, move closer to ensure two or three cards hit your target.
- Use Cover: Peek out from walls, shoot, then hide to reload. This mitigates Tara’s slow reload.
- Piercing Plays: Line up targets (for example, an enemy behind another) so one card hits both.
- Conserve Ammo: Don’t fire at empty spaces. Tara only has three projectiles; guard them.
Overall, Triple Tarot rewards accuracy and positioning. Good Tara players will often be found behind cover, strategically shooting into groups or picking off weakened enemies with multi-card hits. Despite her long range, remember that Tara is most deadly when at mid-range so she can hit multiple cards on enemies.
Tara’s Super Ability: Gravity (Black Hole)
Tara’s Super is called Gravity. She throws a special card that lands and transforms into a black hole. For about 0.7 seconds, the black hole’s pull sucks in every enemy within roughly 3 tiles of its center. After the pull, the black hole explodes in a small radius, dealing damage and knocking enemies back slightly. It also breaks wooden obstacles.
The Gravity Super is all about crowd control. Here’s how to use it effectively:
- Crowd Wipe: Aim to catch multiple enemies. In modes like Gem Grab or Brawl Ball, opponents often cluster around the goal or an objective. Hitting the black hole on that cluster can group them perfectly for follow-up damage.
- Finishing Kills: After pulling enemies together, follow up with your Triple Tarot or gadgets. This combo often instantly destroys low-health opponents.
- Objective Denial: You can use it defensively to pull enemies away from zones, gems, or the safe. For example, if the enemy is pushing on your Heist safe, pull them back to interrupt.
- Escape Tool: If you’re being chased, throw Gravity behind you on the pursuer. The pull and explosion can stop or slow them, giving you time to retreat.
- Break Walls: The explosion will destroy wood cover. Use it to open up map sections (like finding hiding enemies) or create new sight lines for your allies.
- Team Synergy: Coordinate with teammates. A Brock or Bea can fire high-damage attacks into the trapped group. A Gene can teleport to the Black Hole’s location to deal extra damage.
Important Points:
- The pull is brief but strong. Enemies only have 0.7 seconds; many will be unable to escape if they’re in range.
- Position carefully. Throwing it into tight spaces (corridors, jungle bushes) can trap enemies with no escape.
- Be aware enemies may try to dodge or shoot through. The key is that once the pull is over, the explosion still hits.
Mastering Tara’s Super is crucial. It can swing teamfights, but it must hit more than one enemy to be worthwhile. Use Gravity when multiple enemies are visible, or as a follow-up to other crowd-control attacks. A well-placed Super can single-handedly win a 3v3 battle for your team.
Star Powers and Gadgets: Full Breakdown
Tara gains Star Powers and Gadgets as she levels up. These greatly affect how you build and play her.
Star Powers (unlock at Power 9 & 10):
- Black Portal: Tara’s Super spawns a shadowy Tara clone when she uses Gravity. This small clone has fast melee attacks and chases the nearest enemy for about 4 seconds. It has low health but can surprise opponents.
Use: The clone adds extra damage and distraction after you pull enemies. It’s great for offensive play. For example, after your Super, the clone can chase fleeing foes or help finish off survivors. - Healing Shade: Tara’s Super spawns a healing shadow that stays near the center of the black hole. This shade heals Tara and nearby allies (400 HP every 0.6s) for up to 6 heals before disappearing.
Use: This turns your Super into a support tool. Instead of dealing more damage, it sustains your team through fights. Best used when teammates are low on health. For instance, throw your Super into a melee brawl with allies to keep them alive longer.
Choosing Star Powers:
- Black Portal is generally better for high damage and solo plays. It’s useful when you want the extra DPS and scouting from the clone.
- Healing Shade is often better in coordinated 3v3 modes (Gem Grab, Brawl Ball) where team healing has more value. If your squad lacks healers, Healing Shade can make a big difference.
Gadgets (unlock at Power 7 & 9):
- Psychic Enhancer (Cooldown ~20s): When activated, Tara (and all allies) see every enemy on the map for 4 seconds, even if they’re hiding in bushes or invisible. A small eye icon appears above revealed enemies.
Use: This is a vision-control tool. Use it on bushy maps (like Snake Prairie, Cavern Churn) or if invisible enemies (Leon, Bea, 8-Bit with Speed) are suspected. It prevents ambushes by revealing hidden foes. Remember, if Tara dies, the effect ends early. - Support From Beyond (Cooldown ~15s): Tara summons three shadow clones around her in a triangle. Each clone has 1080 HP and attacks with 665 damage (every 0.6s, melee range). They last for 6 seconds or until destroyed.
Use: These clones act like a brief minion army. They can tank a few shots and deal extra damage. Use it offensively when engaging to overwhelm enemies, or defensively to soak damage. For example, trigger it when about to fight a tough brawler – the clones will distract and help deal damage. They pair well with the Pet Power Gear (see below) to amplify their damage.
In summary, Tara’s Star Powers and Gadgets let you adjust her role. Black Portal turns her into a mini-assassin; Healing Shade makes her a healer. Psychic Enhancer gives team vision; Support clones boost her damage output. Choose them based on your team needs and map.
Best Gears for Tara
In Brawl Stars, Gears add extra effects. For Tara, the top recommended Gears are:
- Epic Gear – Pet Power: Must-have. This increases all spawnable damage/healing by 25%. For Tara, it buffs her Support From Beyond clones and Black Portal clone (damage up) and increases the healing from Healing Shade. In short, it makes everything Tara summons stronger. If you often use her clones or Healing Shade, Pet Power dramatically improves their effectiveness.
- Super Rare Gear – Damage Gear: Great for clutch plays. When Tara is below 50% HP, she deals 15% more damage. This helps her win duels when she’s low on health. It’s useful if you play aggressively and often find yourself in close fights.
- Super Rare Gear – Shield Gear: Tara gains a 900 HP shield (which refills over time when not damaged). This one-time shield can save Tara in tight situations, giving her room to land a final Super or escape a burst of damage. It boosts her durability against high-damage opponents (e.g. Shelby or Belle).
- Super Rare Gear – Speed Gear: Tara moves 15% faster while in bushes. This synergy can be useful if you rely on ambush tactics. For example, with Psychic Enhancer you reveal enemies, then your extra speed helps you close in quickly. It’s situational but powerful on jungle maps.
- Super Rare Gear – Gadget Cooldown: Reduces Gadget cooldown by 15%. This lets Tara use gadgets like Psychic Enhancer or Support clones more often. If you depend heavily on frequent gadget use (especially Psychic Enhancer), this gear ensures it’s ready faster.
- Super Rare Gear – Vision Gear: Reveals enemies in a bush for 2 seconds after you damage them. It’s less crucial, but can help you track opponents once you hit them. It doesn’t stack with Psychic Enhancer but is handy if you fight in and out of cover frequently.
Gear Combinations: Most top Tara builds use Pet Power in one slot (since it boosts her summonables) and pair it with Damage Gear in the other. That gives her strong offense. Alternatively, Pet Power + Shield Gear gives more survivability. If you like to roam in bushes, Pet Power + Speed Gear is fun.
Remember: pick Gears based on your playstyle. Pets & Damage for offense; Shield for defense; Speed or Cooldown for map-specific needs.
Hypercharge Ability Overview
Hypercharge (from the Starr Park feature) gives Tara a special buff called Supermassive. When Tara fills her hyper meter and activates it, she gains:
- 20% larger Super radius. Her Gravity black hole becomes bigger, pulling in more enemies.
- +25% Damage. All her attacks (cards and Super) hit harder.
- +24% Speed. She moves faster, making her more agile in fights.
- +5% Shield. Slight extra durability.
In practice, activating Supermassive before a big fight is a game-changer. For example, if you time it right and then throw your Super, it will sweep up more enemies. The damage and speed boost help you dominate skirmishes during its brief duration.
How to use Supermassive: You usually charge your hyper by dealing damage in battle and tap to activate it. It’s best used right before an engagement or when you are about to cast your Super. That way, the enlarged black hole and stat boosts hit opponents. Watch for the glowing aura and make your move.
Overall, Hypercharge strengthens Tara’s kit significantly. It rewards aggressive play by letting you catch more enemies and deal extra damage. Keep an eye on your hyper bar and unleash Supermassive at key moments to turn the tide.
Best Game Modes and Maps for Tara
Game Modes Where Tara Shines
- Gem Grab: Often Tara’s top mode. Teams fight over a gem mine in the center. Tara excels here because opponents cluster around the gems. Her Super can pull multiple enemy gem-carriers into one spot for quick takedowns. She can also chip away at their health from mid-range while protecting your own gem carrier. Controlling the middle with Tara can dominate matches.
- Brawl Ball (3v3 or 5v5): Tara is great at Brawl Ball. Her Super can disrupt enemy defenses by dragging players away from the goal or pulling the ball-carrier into your team. In 5v5 Brawl Ball (with larger teams), her area control becomes even more impactful. She can help clear a path for goals and create scoring opportunities.
- Duo Showdown: In 2v2 Showdown, Tara’s pull-and-shoot playstyle works well to eliminate solitary enemies. She can use Psychic Enhancer to avoid ambushes in the tall grass and then burst foes with Triple Tarot after a well-placed Super. Tara pairs nicely with another solo brawler (like a tank or sharpshooter) to cover each other’s weaknesses.
- Knockout / Smash & Grab: These are like variants of Gem Grab without collecting gems; still, they revolve around 3v3 combat. Tara’s ability to control space and wipe enemies makes her a solid pick. She can hold down zones (Smash) or clump up enemies attempting to stun you (Knockout).
Moderate Performance Modes
- Heist: Tara can be situationally useful. In defensive Heist, she can shoot down long lanes at the safe or use her Super to push attackers back. On offense, throwing her Super into or near the safe can stall defenders. She’s not always top-tier here, but on wide-open maps (like Fortune Blocks), she can ambush enemies near the safe with a surprise pull.
- Hot Zone: Tara isn’t a top Hot Zone pick, but on some maps she can use her area damage to contest zones. She can pull enemies off a zone or use Psychic Enhancer to see them. However, other brawlers usually excel more at zoning control.
- Bounty: Tara is not commonly used in Bounty (star-collection mode). Her inability to one-shot targets from long range is a drawback. She can still shoot enemies behind cover and use her Super if a teamfight breaks out, but she’s secondary to snipers and high-damage brawlers in this mode.
- Robo Rumble / Big Game: In robot-themed modes, Tara is okay. Her super does decent damage to the boss or waves, and she can break walls. But other brawlers (like ash or frank) often handle bosses better. Use her Black Hole to gather Robo enemies together for splash damage, if on the roster.
Best Maps for Tara
Tara thrives on maps where enemies bunch up or where her pull is most effective. Some examples:
- Bushy / Choke-Point Maps: Snake Prairie, Cascade Springs, Cavern Churn, Woodland, Skull Creek. These maps have lots of grass and corridors. Enemies hiding close together can be sucked into one spot by Tara’s Super. Her Psychic Enhancer gadget is also very strong here.
- Gem Grab Maps (with grouped center): Center Stage, Gem Fort. If both teams meet in the middle, Tara can catch them all.
- Brawl Ball Maps: Sneaky Fields, Turf Takeover maps with narrow passages. In these, defenders often block a single corridor; Tara can force them out.
- Double Swoosh (5v5 Brawl Ball): Statistics show Tara performs very well on Double Swoosh, since it has a confined center and long lanes. She can pull multiple enemies near the goal.
- Last Stop (Heist) or similar: She also shows up strong on Last Stop, which has an open center and cover.
- Teamfight Arenas: In any map where large fights happen in the center (for example some special events or clustered areas), Tara will do well.
Map Tips
- In Gem Grab, control the center bush area. Use Psychic Enhancer to reveal enemies hiding there. Keep your distance and pull enemies away from gems when they try to attack.
- In Brawl Ball, adapt. You might position behind defenders and use your Super to disrupt. For example, if enemies crowd near their goal, toss a Black Hole to scatter them. Or defend your own goal by dropping a Super on opponents.
- In Showdown (especially Duo), use bushes for cover and awareness. Activate Psychic Enhancer near suspected hiding spots. Team coordination is key in Duo: signal to your partner when you’re about to Super so they can follow up.
While Tara can be played in any mode, she truly shines in modes with 3v3 team fights and maps with bushes. Avoid solo-centric maps with no cover, and leverage the ones above to maximize her kit.
Best Team Compositions Featuring Tara
Tara excels when paired with the right teammates. Here are some strong team compositions:
- Tara + Tank + Ranged Damage Dealer:
Example: Tara + El Primo (or Bull) + Brock (or Bea).
Strategy: The tank (El Primo) jumps in, grouping enemies by raw pressure. Tara follows up with her Super to pull the clustered enemies and deals damage. Meanwhile the ranged DPS (Brock) fires rockets at the same group for huge combined damage. Tara’s Super sets up a perfect kill zone for the high-damage brawler. - Tara + Support/Healer + Burst:
Example: Tara + Byron (or Poco) + Gene (or Spike).
Strategy: Byron or Poco provide healing/sustain for the team. Tara uses Healing Shade if needed or Black Portal for offense. Gene can teleport (or slow) enemies into Tara’s Super, trapping them further. Tara’s pull then allows Spike or Gene to pour on damage with their attacks and super. This comp is about sustained fights and controlling the battlefield. - Tara + Flanker + Area Control:
Example: Tara + Piper (or Belle) + Squeak (or Stu).
Strategy: Piper snipes from a distance while Tara controls mid with her Super. Squeak or Stu lays traps (like goo bombs or grenades) in areas where Tara pulls enemies, amplifying area damage. When Tara initiates with her black hole, Piper can finish off any survivors from afar. This comp is dangerous because enemies either get caught by Tara or bombarded by backline. - Tara + Brawler Tag Team:
Example: Tara + Ash + Spike (with Brawl Ball 5v5).
Strategy: Ash can push forward and slam his ball, knocking foes together. Tara drops a black hole on that pack, and Spike throws grenades into it. The combination of Ash’s push, Tara’s pull, and Spike’s area attack often clears out a whole group. Good for large-scale pushes. - Tara + Counter-Support:
Example: Tara + El Primo + Spike in Gem Grab.
Strategy: Primo locks down the center with his super and damage. Tara uses her super to keep enemies from interrupting Primo’s control of gems. Spike sits behind forming a zone denial, leaving any enemies who escape Tara completely blocked by Spike’s slows.
General Team Tips:
- Pair Tara with at least one tank or bruiser (like El Primo, Rosa, or Bull) to create pressure. This makes it easier for Tara to land her Super.
- Include a high-DPS or area-damage brawler (like Brock, Piper, or Amber) who can capitalize on the enemies pulled together.
- If using Healing Shade, make sure someone can benefit from the healing (a tank or control brawler). Tara + healer (Poco/Byron) is often effective.
- Communication: Let teammates know when you plan to use your Super. That way, they can use theirs simultaneously for even bigger combos.
In summary, well-rounded teams that can engage in tight battles are ideal for Tara. She plays best in balanced trios: one front-liner, one back-line damage, and herself as the crowd-control specialist.
How to Play Tara Effectively (Tips and Strategies)
To get the most out of Tara, focus on positioning, timing, and accuracy. Here are advanced tips for how to play Tara effectively:
- Optimal Positioning: Tara’s Triple Tarot is most deadly at medium to close range, but you must avoid dying. Try to stay just outside the enemy’s immediate reach (unless you’re confident you can secure a kill). Stay behind frontliners or near walls so you can retreat quickly after shooting.
- Aim Carefully: Because of her spread, line up your shots whenever possible. Firing into corners or against walls can catch multiple enemies. In open fights, don’t fire all three cards at once into thin air – pick your target and make sure you’ll hit.
- Time Your Super: Use Gravity when you can catch more than one foe. It’s often best right after an enemy rushes an objective or when two or more enemies group together. Avoid wasting Super on a lone target far from allies.
- Follow-Up Quickly: After using Super to pull enemies, immediately switch to offense. Fire your Triple Tarot cards at the grouped enemies or activate your Support clones. The momentary chaos from the pull is your chance to knock out enemies.
- Use Gadgets Wisely:
- Psychic Enhancer: Save it for maps or moments when you truly suspect a bush ambush. Don’t waste it if fights are happening in open ground.
- Support From Beyond: Activate as you engage enemies. For example, just before exchanging fire, pop it so the clones leap in. The clones should distract and damage opponents while you stay safe. Remember they deal melee damage, so combining them with your attacks traps foes.
- Manage Reload: Tara’s slow reload means you can’t shoot continuously. If you fire all three cards, retreat or hide while reloading. Reposition after each shot. This keeps you alive and ready to shoot again.
- Watch Enemy Counters: If facing sharpshooters (Piper, Brock) or burst damage, keep your distance and consider retreating until you have cover. Against stealthy flanks (Leon, Sandy), save Psychic Enhancer or stay with your team.
- Star Power Decision: If you picked Healing Shade, aim your Super where more allies are so they get healed. If you have Black Portal, use the clone aggressively after every pull. Know which Star Power you have and adjust your tactics.
- Stay Aware of Hypercharge: If your hyper is ready, don’t be too passive; use the buffs to your advantage. Conversely, if you have high Hyper charge and low health, consider activating it before a risky fight for the shield boost.
Overall, Tara requires practice and map awareness. Keep track of her reload and Super meters. Use bushes and cover smartly. With experience, you’ll learn when to harass with cards and when to unleash that game-changing black hole.
Common Mistakes to Avoid When Playing Tara
Even good Tara players can make errors. Avoid these pitfalls:
- Using Super on Single Enemies: Tara’s Super is meant for crowds. Don’t waste it on one distant brawler. If no one else is near, save it for later or use it to escape.
- Overextending: Tara is not a frontline brawler. Dive too deeply, and enemies will kill you before your Super even gets off cooldown. Always know where your escape routes are.
- Firing at Ineffective Range: Shooting at full range often hits with only one card. If you’re far, reposition first or use your gadget to find them. Conversely, point-blank shots at a high-health tank might not kill; aim to hit multiple times.
- Wasting Gadgets: For example, using Psychic Enhancer when you already know all enemies’ locations accomplishes little. Or popping Support clones when no enemies are in sight. Time your gadgets for actual fights.
- Ignoring Reload Management: Do not shoot all three cards blindly and get caught reloading. Each attack cycle should be planned: shoot, then find cover or retreat to reload safely.
- Poor Super Placement: Avoid tossing the black hole too close to obstacles or walls where enemies can escape behind cover. Also, be careful not to trap your teammates in the Super’s area if they’re too close.
- Neglecting Star Powers: If you have Healing Shade, don’t forget to use it for team healing instead of attacking. If you have Black Portal, don’t ignore the extra clone damage by staying passive. Adjust your playstyle to your chosen Star Power.
- Not Adapting to Opponents: If you’re being outranged or countered, play more defensively. For instance, against a long-range sniper, avoid open duels and try to pull them with your Super instead of shooting from far away.
By avoiding these mistakes – such as throwing away your Super or peaking badly during reload – you’ll maximize Tara’s effectiveness. Watch replays of your games: often you’ll spot a missed Super opportunity or a wasted gadget that cost you.
Tara’s Skins and Customization Options
Tara has several skins that change her look. While they don’t affect gameplay, they’re a fun way to personalize your Tara. Some notable skins include:
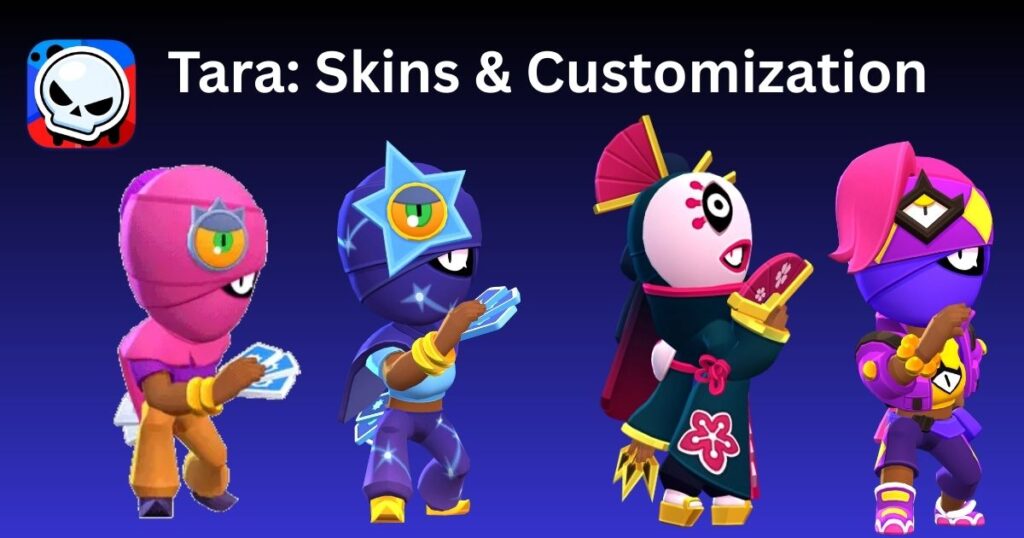
- Default (Tara): The basic purple-robed tarot reader.
- Stara (Rare): A white-and-gold “celestial” skin that makes Tara look like a starry priestess (costs 29 Gems or 1000 Bling).
- Street Ninja (Super Rare): A ninja-themed skin (also called Urban Ninja) where Tara wears black and red ninja garb. This was available for Gems/Brawl Pass.
- Misfortune (Epic – Outlaws): Tara as a pirate named Misfortune. She has a tricorn hat and uses skeletal cards. (About 149 Gems or 5000 Bling).
- Tempest (Epic – Sands of Time): An archaeologist/treasure-hunter style with desert robes and swirling sand-themed cards. (149 Gems or 5000 Bling).
- Ragequit (Epic – BSC 2022): A cyberpunk or “rage” themed skin, available from the 2022 World Finals or for 149 Gems.
- True Silver / True Gold (Cosmetic Recolors): Special recolors obtainable via boxes. True Silver gives Tara a sleek silver palette; True Gold gives her a rich golden look. These were available through special events or boxes.
- Miscellaneous Event Skins: Occasionally Brawl Stars releases seasonal or special skins for Tara through Brawl Pass or events. Keep an eye on updates for new designs.
Skins are purely cosmetic – they have no stat impact – but they add flair. Show off your favorite theme: mystical (Stara), stealthy (Street Ninja), or spooky (Misfortune). Whether you want to match a team theme or just look cool, equipping a skin is a nice way to express style in battle.
Conclusion
Tara is a versatile Mythic Brawler whose mystical flair and crowd-control make her both unique and powerful. Mastering Tara means learning her Triple Tarot precision shots and timing her Gravity Super for maximum effect. By choosing the right Star Power (Black Portal or Healing Shade) and Gadgets (Psychic Enhancer or Support clones), and equipping the optimal gear build, you can tailor Tara to your playstyle. She shines in 3v3 team modes like Gem Grab and Brawl Ball, where her ability to gather enemies can turn the tide of battle.
Clear communication and coordination with your team will amplify Tara’s impact. Positioning behind cover, aiming her cards carefully, and following up her Super with concentrated fire are keys to success. Watch for common pitfalls (like wasting her Super on lone opponents) and always adjust your strategy.
Above all, have fun with Tara! With practice, you’ll wield those tarot cards like an expert and pull your enemies into chaotic defeats. We hope this guide helps you climb the ranks with Tara and enjoy everything this Mythic Brawler has to offer.
FAQs
- How do I unlock Tara’s Star Powers and Gadgets?
Star Powers and Gadgets unlock by leveling up Tara. Reach Power Level 7 to get the first Gadget (via a quest) and Power Level 9 for the second Gadget. Star Powers unlock randomly as rewards when Tara hits Power Levels 9 and 10. You’ll need to earn Power Points for Tara (via boxes or the Shop) to level her up.
- Which Star Power should I use for Tara? (Black Portal vs. Healing Shade)
It depends on your role. Black Portal is great for aggressive play – it spawns an attacking clone to add offense. Use it when you want extra damage and solo kills. Healing Shade is better for support – it creates a healing clone to restore you and teammates. It’s ideal in coordinated team modes if your team needs sustain. In general, Black Portal is a bit more popular for casual and solo play, while Healing Shade can shine with good teamwork.
- What’s the best way to use Tara’s Super (Black Hole)?
Aim to catch multiple enemies at once. Use it when enemies are clustered, such as around gem mines, control zones, or ball. After deploying the Super to group enemies, immediately follow up with Triple Tarot and gadgets to finish them. You can also use the Super defensively by throwing it at pursuers to escape. Always try to maximize the number of targets in the black hole’s range.
- Which Gadget should I pick for Tara?
Support From Beyond is usually the go-to Gadget: it summons three attacking clones that can quickly pressure enemies and tank shots. It’s especially strong with Pet Power Gear. Psychic Enhancer is more situational: use it on maps with heavy bush use (Snake Prairie, Haunted Ruins, etc.) or if invisible enemies are a threat. Most players pick Support From Beyond as primary, and Psychic Enhancer when needing vision control on certain maps.
- Is Tara good for beginners?
Tara has a bit of a learning curve due to her spread attack and skillshot Super, but she is accessible. Beginners should focus on practicing her aim and learning when to use her Super. She’s forgiving because her cards pierce and have range. It’s helpful to play a few matches focusing just on landing those triple hits. Over time, you’ll get comfortable with her timing. Watching gameplay videos or using in Friendly Matches can also help beginners master Tara.
- What game modes is Tara best in?
Tara excels in Gem Grab (due to team fights and clustered enemies), Brawl Ball (especially 5v5), and Duo Showdown. She does well in any 3v3 mode where enemies gather. She’s less commonly used in Bounty or Solo Showdown. Focus her play on modes where team coordination or large brawls happen.
- How does Pet Power gear help Tara?
Pet Power gear boosts the damage (and healing) of spawnables by 25%. For Tara, it specifically increases the damage of her Support clones and Black Portal clone, and the healing rate of Healing Shade. In practice, it makes her Gadgets and one Star Power clone much stronger. Equipping Pet Power is usually recommended if you rely on those summoned units.
- How do I counter Tara?
Brawlers with high burst or range can threaten Tara. For example, Piper or Brock can keep her at bay, and tanks like Bull can survive her pull and burst her down. Against Tara, avoid grouping up. If you suspect her, spread out to minimize her pull’s impact. In your team, use brawlers who can chase or lockdown her (e.g., Leon’s invisibility for an ambush, or Ash’s walls to zone her). Communication and covering flanks help deal with Tara’s Black Hole.
- Can Tara’s Super pull one enemy?
The Super will pull in any enemy within its radius. However, it’s most effective with multiple targets. If only one enemy is in range, they will be pulled too, but using the Super on a lone brawler is generally a waste because you miss the multi-target potential. It’s better to save it for fights where at least two enemies are around.
- What should I look for in team compositions with Tara?
Look for synergy. Tara works well with tanks (like Rosa or El Primo) who can jump into fights she initiates. Combine her with long-range damage dealers (like Piper or Brock) who can pummel enemies she traps. Healers (Poco, Byron) fit too, especially with Healing Shade. Avoid putting her on teams with no follow-up damage, as her pull alone isn’t always lethal.