Ultimate Brock Brawl Stars Guide: Complete Master Guide 2025
Are you tired of watching your Brock get eliminated early in matches while other players dominate with this rocket-launching legend? You’re not alone. Many Brawl Stars players struggle to unlock Brock’s true potential, missing out on his incredible damage output and strategic advantages that can turn the tide of any battle.
Brock Brawl Stars isn’t just another brawler – he’s a game-changing demolition expert who can control entire maps when played correctly. Whether you’re grinding trophies, pushing ranked matches, or battling in special events, mastering Brock’s unique mechanics will elevate your gameplay from average to exceptional.
This is the most comprehensive Brock guide available, covering every detail from basic stats to advanced pro strategies, complete skin collections, power comparisons, and insider tips that top players use to dominate the leaderboards.
Complete Brock Character Overview
Character Background & Design
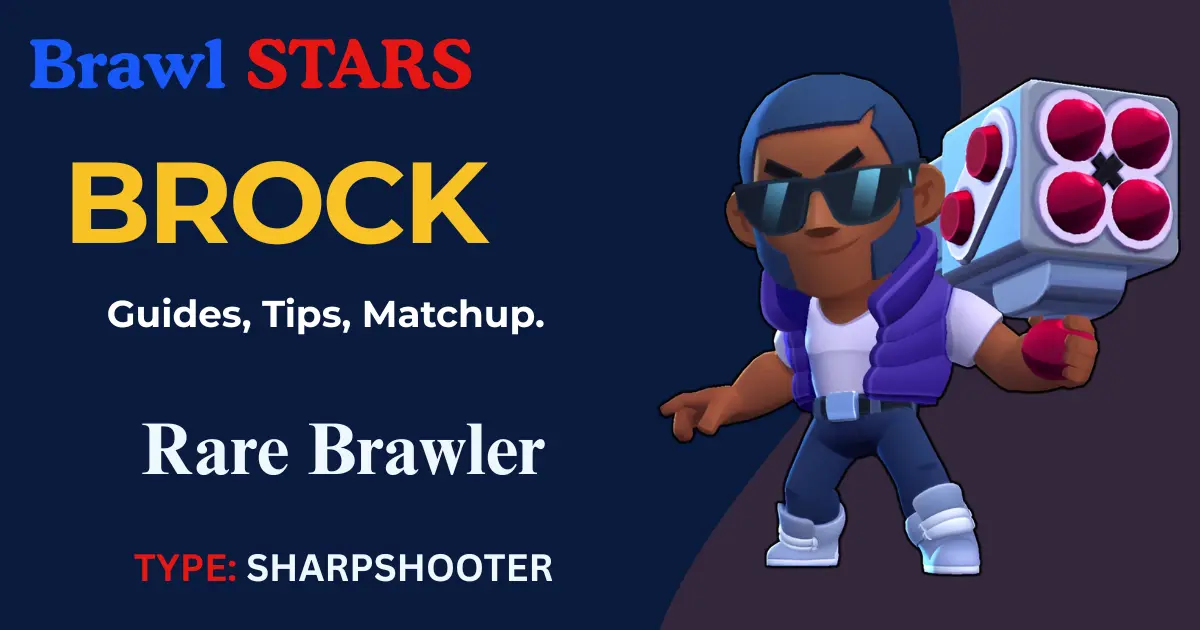
Brock is a Rare brawler who wields a powerful rocket launcher. Released as one of the original brawlers in the Brawl Stars global launch, he represents the quintessential long-range damage dealer with explosive capabilities. His design embodies a classic action movie hero archetype, featuring military-inspired gear and a confident demeanor.
Character Classification:
| Type | Sharpshooter |
| Rarity | Rare (Purple) |
| Unlock Requirements | 30 Trophies |
| Voice Actor | Professional voice acting with signature catchphrases |
| Personality: | Confident, explosive, thrill-seeking demolition expert |
Complete Base Stats Table
| Power Level | Health | Damage per Rocket | Super Damage | Reload Speed | Attack Range |
|---|---|---|---|---|---|
| Power 1 | 2800 | 1260 | 504 per rocket | 1.6 seconds | 10 tiles |
| Power 2 | 2940 | 1323 | 529 per rocket | 1.6 seconds | 10 tiles |
| Power 3 | 3080 | 1386 | 554 per rocket | 1.6 seconds | 10 tiles |
| Power 4 | 3220 | 1449 | 579 per rocket | 1.6 seconds | 10 tiles |
| Power 5 | 3360 | 1512 | 605 per rocket | 1.6 seconds | 10 tiles |
| Power 6 | 3500 | 1575 | 630 per rocket | 1.6 seconds | 10 tiles |
| Power 7 | 3640 | 1638 | 655 per rocket | 1.6 seconds | 10 tiles |
| Power 8 | 3780 | 1701 | 680 per rocket | 1.6 seconds | 10 tiles |
| Power 9 | 3920 | 1764 | 706 per rocket | 1.6 seconds | 10 tiles |
| Power 10 | 4060 | 1827 | 731 per rocket | 1.6 seconds | 10 tiles |
| Power 11 | 4480 | 2016 | 806 per rocket | 1.6 seconds | 10 tiles |
Detailed Movement & Combat Stats
- Movement Speed: 720 units per second (Normal)
- Attack Width: Projectile has 0.33 tile radius
- Splash Damage Radius: 1.33 tiles
- Super Area Coverage: 3×5 tile rectangle
- Super Delay: 2 seconds from cast to impact
- Projectile Speed: 3000 units per second
- Super Rocket Count: 10 rockets total
- Ammo Capacity: 3 rockets
- Ammo per Attack: 1 rocket
Complete Attack Mechanics Analysis
Main Attack: Rockin’ Rocket
Detailed Mechanics: Brock fires a single explosive rocket that travels in a straight line until it hits an enemy, obstacle, or reaches maximum range. The rocket deals full damage to the primary target and reduces splash damage to nearby enemies within the blast radius.
Advanced Technical Details:
- Projectile Type: Linear projectile with splash damage
- Damage Falloff: No damage falloff over distance
- Splash Damage: 100% of main damage to secondary targets
- Wall Interaction: Rocket explodes on contact with walls
- Grass Interaction: Rocket passes through tall grass
- Water Interaction: Cannot shoot over water obstacles
Tactical Applications:
- Area Denial: Use the splash radius to control choke points
- Wall Breaking: Break destructible walls for map control
- Crowd Control: Hit multiple grouped enemies simultaneously
- Prediction Shots: Lead moving targets due to projectile travel time
- Zoning: Force enemies away from objectives with the threat of damage
Super: Rocket Rain
Complete Super Analysis: Brock’s super launches a devastating barrage of 10 rockets that rain down over a large rectangular area after a 2-second delay. Each rocket in the barrage deals significant damage, making this one of the most powerful area-of-effect abilities in the game.
Super Technical Specifications:
- Total Rockets: 10 individual rockets
- Coverage Pattern: 3×5 tile rectangle (15 tiles total)
- Damage per Rocket: Variable based on power level
- Activation Delay: 2.0 seconds
- Warning Indicator: Red area preview for enemies
- Stacking Damage: Multiple rockets can hit the same target
- Maximum Theoretical Damage: 8060 damage if all rockets hit (Power 11)
Strategic Super Usage:
- Objective Control: Deny access to the gem mine, ball spawn, or safe
- Escape Denial: Block enemy retreat routes
- Bush Checking: Clear large grass areas of hidden enemies
- Team Fight Control: Force enemies to split up or take massive damage
- Defensive Tool: Protect your team’s position from enemy advances
Super Timing Strategies:
- Predictive Casting: Anticipate where enemies will move during a 2-second delay
- Combination Attacks: Coordinate with teammates for guaranteed hits
- Panic Casting: Use defensively when overwhelmed
- Area Lockdown: Control high-traffic map areas for extended periods
Complete Star Powers Deep Dive
Incendiary (First Star Power)
Detailed Mechanics: When Brock’s main attack hits any target (enemy, wall, or obstacle), it creates a fire area that persists for 4 seconds. Enemies standing in the flames take continuous damage over time, making this star power exceptional for area control and damage over time strategies.
Technical Specifications:
- Damage per Second: 300 DPS at all power levels
- Duration: 4.0 seconds
- Area Size: Same as splash damage radius (1.33 tiles)
- Stacking: Multiple fire patches can overlap
- Tick Rate: Damage applied every 0.5 seconds (150 damage per tick)
- Total Potential Damage: 1200 damage if the enemy stays in the fire for the full duration
Strategic Applications:
- Lane Control: Create no-go zones in narrow passages
- Objective Denial: Prevent enemies from approaching key areas
- Damage Amplification: Combine with splash damage for massive DPS
- Bush Control: Clear and control grass areas effectively
- Escape Prevention: Block retreat routes with fire patches
Optimal Game Modes for Incendiary:
- Gem Grab: Control the center mine area with persistent fire
- Hot Zone: Deny zone occupation with fire damage
- Siege: Protect bot spawn areas from enemy interference
- Heist: Create defensive fire barriers around the safe
Rocket No. 4 (Second Star Power)
Advanced Mechanics: If Brock’s main attack fails to hit an enemy brawler, his next attack receives a significant damage boost and increased explosion radius. This star power rewards accurate shooting while providing insurance for missed shots.
Technical Details:
- Damage Bonus: +1324 damage at Power 9+ (scales with power level)
- Radius Increase: +0.67 tiles explosion radius (doubled splash area)
- Activation Condition: Must miss an enemy with the previous shot
- Duration: Buff lasts until the next shot is fired
- Visual Indicator: Brock’s rocket launcher glows when the buff is active
- Wall Hits: Hitting walls doesn’t consume or activate the buff
Tactical Advantages:
- Burst Damage: Massive damage potential for finishing enemies
- Area Control: A Larger explosion radius affects more enemies
- Pressure Tool: Forces enemies to respect your next shot
- Comeback Potential: Turn missed shots into opportunities
- Mind Games: Enemies fear your powered-up attack
Strategic Considerations:
- Risk vs Reward: Sometimes intentionally miss to activate the buff
- Target Priority: Save buffed shot for high-value targets
- Positioning: Use buff to control larger areas
- Timing: Coordinate buffed shots with team engagements
Complete Gadgets Analysis
Rocket Laces (First Gadget)
Detailed Functionality: Brock activates rocket-powered boots that launch him backward while simultaneously dealing damage to all enemies within close range. This gadget serves as both an escape tool and a defensive mechanism against assassins and close-range threats.
Technical Specifications:
- Damage Output: 500 damage to all nearby enemies
- Knockback Distance: 3 tiles backward movement
- Damage Radius: 2.5 tile radius around Brock
- Cast Time: Instant activation
- Immunity Frames: Brief invincibility during activation
- Cooldown: 3 uses per match
- Animation Duration: 0.5 seconds total
Strategic Applications:
- Assassin Counter: Escape from Mortis, Edgar, or other close-range threats
- Damage Combo: Deal extra damage while repositioning
- Positional Reset: Return to optimal long-range positioning
- Surprise Attack: Unexpected damage to pursuing enemies
- Wall Jumping: Escape over thin walls with knockback distance
Usage Scenarios:
- Emergency Escape: When surrounded by multiple enemies
- Assassin Deterrent: Create space against dive compositions
- Offensive Tool: Damage enemies while repositioning for better angles
- Map Navigation: Cross gaps or obstacles efficiently

Rocket Fuel (Second Gadget)
Advanced Mechanics: Brock’s next main attack receives dramatically increased range and wall-breaking capabilities. This gadget transforms Brock into a temporary sniper with map-altering capabilities, enabling strategic plays that can significantly alter match dynamics.
Technical Specifications:
- Range Bonus: +1500 range (approximately 2.5 additional tiles)
- Total Range: 12.5 tiles (longest in the game while active)
- Wall Breaking: Destroys all destructible walls in the projectile’s path
- Damage: Standard rocket damage with normal splash radius
- Activation: Must be used before firing the enhanced shot
- Duration: Single enhanced attack only
- Cooldown: 3 uses per match
Game-Changing Applications:
- Map Control: Open new pathways by destroying wall formations
- Sniper Mode: Reach enemies previously safe from attack
- Objective Pressure: Attack safes, IKE turrets from extreme range
- Tactical Advantage: Create new sightlines and attack angles
- Surprise Factor: Hit enemies who think they’re safe
Strategic Timing:
- Map Opening: Early game to create better positioning
- Pressure Moments: When enemies hide behind walls with low health
- Objective Control: Attack defended positions from impossible angles
- Team Coordination: Combine with team pushes for maximum impact
Power Level Comparison Analysis
Upgrade Priority Guide
Power 1-6: Foundation Building
- Primary Focus: Increase base survivability and damage output
- Key Milestone: Power 6 provides a solid foundation for competitive play
- Investment Strategy: Use coins efficiently, save power points for later levels
Power 7: First Major Power Spike
- Unlock: First Star Power (typically Incendiary)
- Impact: 30% increase in overall effectiveness
- Priority: High – significant improvement in area control
- Recommended for: All serious Brock players
Power 9: Gadget Access
- Unlock: Both gadgets become available
- Impact: Dramatic improvement in survival and utility
- Strategic Value: Essential for competitive play
- Investment: Worth the resources
Power 10: Complete Kit
- Unlock: Second Star Power (Rocket No. 4)
- Flexibility: Ability to adapt star power to different modes
- Meta Relevance: Required for highest-level play
- Value: High for dedicated Brock mains
Power 11: Maximum Potential
- Unlock: Gear system access
- Stat Boost: 14% health increase (840 additional HP)
- Damage Boost: 14% damage increase (252 additional damage)
- Gear Benefits: Additional customization options
Resource Investment Calculator
| Power Level | Coins Required | Power Points Required | Cumulative Investment |
|---|---|---|---|
| 1→2 | 20 | 1 | 20 coins, 1 PP |
| 2→3 | 35 | 2 | 55 coins, 3 PP |
| 3→4 | 75 | 3 | 130 coins, 6 PP |
| 4→5 | 140 | 5 | 270 coins, 11 PP |
| 5→6 | 290 | 8 | 560 coins, 19 PP |
| 6→7 | 480 | 13 | 1,040 coins, 32 PP |
| 7→8 | 800 | 21 | 1,840 coins, 53 PP |
| 8→9 | 1,250 | 34 | 3,090 coins, 87 PP |
| 9→10 | 1,875 | 55 | 4,965 coins, 142 PP |
| 10→11 | 2,800 | 89 | 7,765 coins, 231 PP |
Complete Skins Collection & Analysis
Default Brock
- Availability: Default (Free)
- Design: Classic demolition expert with military gear
- Features: Standard animations and effects
- Rarity: Common
- Special Notes: Clean, professional design that shows character and personality
Beach Brock
- Cost: 39 Gems
- Availability: Shop rotation
- Design Theme: Summer beach vacation
- Visual Changes: Sunglasses, beach shorts, tropical shirt
- Special Effects: None (cosmetic only)
- Popularity: High – affordable and appealing design
- Seasonal Relevance: Perfect for summer events
Boom Box Brock
- Cost: 79 Gems
- Availability: Regular shop rotation
- Design Theme: 1980s music and boom box culture
- Visual Changes: Boom box launcher, retro clothing, headphones
- Special Effects: Music-themed attack sounds
- Collector Value: Medium – nostalgic appeal
- Unique Features: Audio enhancement with music-themed effects
Hot Rod Brock
- Cost: 149 Gems
- Availability: Featured shop rotations
- Design Theme: Classic American muscle car culture
- Visual Changes: Flame designs, racing gear, car-themed launcher
- Special Effects: Enhanced explosion effects with flame themes
- Premium Features: Upgraded visual effects justify the higher cost
- Target Audience: Collectors and car enthusiasts
Lion Dance Brock
- Cost: 79 Gems
- Availability: Lunar New Year events
- Design Theme: Traditional Chinese Lion Dance celebration
- Visual Changes: Colorful lion costume, festival decorations
- Cultural Significance: Celebrates Chinese New Year traditions
- Limited Availability: Seasonal appearance only
- Special Features: Festival-themed attack effects
Lunar Year Brock (Detailed Guide)
- Cost: 79-149 Gems (varies by year)
- Availability: Chinese New Year events (January/February)
- Design Theme: Lunar New Year celebration with traditional elements
- Visual Changes: Red and gold color scheme, traditional decorations
- Special Effects: Firework-themed explosions and sounds
- Rarity: Limited-time exclusive
- Acquisition Strategy: Save gems in advance, monitor social media for announcements
How to Get Lunar Year Brock:
- Event Timing: Available during Chinese New Year celebrations
- Direct Purchase: Buy with gems during limited-time availability
- Brawl Pass: Sometimes featured in seasonal pass rewards
- Special Offers: Occasionally appears in discounted bundles
- Community Events: Rare community challenge rewards
Return Schedule:
- Typically returns annually during the Lunar New Year
- May appear during special anniversary events
- No guarantee of yearly return – collect when available
Game Mode Mastery Guide
Gem Grab (S-Tier Performance)
Why Brock Dominates Gem Grab: Gem Grab’s central mine control and team-based gameplay perfectly suit Brock’s long-range damage and area control capabilities. His ability to pressure the center while staying safe makes him invaluable for gem control strategies.
Optimal Positioning:
- Early Game: Control approaches to the center mine
- Mid Game: Support gem carrier with covering fire
- Late Game: Deny enemy approaches with super and fire patches
Strategic Roles:
- Damage Dealer: Primary source of team damage output
- Area Controller: Deny access to key map areas
- Support: Protect the gem carrier from enemy advances
- Finisher: Eliminate low-health enemies attempting escapes
Best Maps for Brock:
- Double Swoosh: Long sightlines favor rocket attacks
- Acute Angle: Multiple choke points for area control
- Deep End: Open areas for positioning flexibility
Team Composition:
- Tank Partner: El Primo, Rosa, for frontline protection
- Support: Poco, Pam for healing and additional area control
- Alternative DPS: Max, Rico for speed and additional damage
Bounty (S-Tier Performance)
Bounty Mastery with Brock: Bounty’s emphasis on eliminations and long-range engagements makes it Brock’s strongest game mode. His ability to pick off enemies from safety while controlling large map areas gives teams significant advantages.
Core Strategy Elements:
- Star Control: Maintain a 2+ star lead through consistent picks
- Map Dominance: Control key sightlines and positions
- Late Game Defense: Use super for area denial during the final countdown
- Pick Potential: Focus on eliminating enemy star carriers
Advanced Bounty Techniques:
- Predictive Shooting: Anticipate enemy movement patterns
- Angle Control: Use walls and obstacles for protected sightlines
- Super Timing: Save for crucial late-game moments
- Team Coordination: Combine attacks for guaranteed eliminations
Top Bounty Maps:
- Dry Season: Perfect open layout for long-range combat
- Snake Prairie: Excellent for controlling bush areas
- Shooting Star: Multiple angles and protected positions
Siege (A-Tier Performance)
Siege Strategy with Brock: Siege’s dual-phase gameplay (bot collection and siege phases) allows Brock to excel in different ways. During the collection phase, he controls bot spawns, and during the siege phase, he provides excellent defense or offense support.
Collection Phase Tactics:
- Bot Control: Dominate the center area where bots spawn
- Team Support: Protect teammates collecting bolts
- Enemy Denial: Prevent enemy bot collection with area control
- Positioning: Maintain a safe distance while pressuring objectives
Siege Phase Applications:
- Offensive Support: Break walls and support the siege bot
- Defensive Control: Protect the IKE turret from enemy siege
- Area Denial: Use super to control large areas around IKE
- Cleanup: Eliminate low-health enemies during chaotic battles
Heist (B-Tier Performance)
Heist Considerations: While not Brock’s strongest mode, he can be effective on specific maps and in certain team compositions. His wall-breaking capabilities and long-range damage provide utility in both attack and defense scenarios.
Defensive Applications:
- Safe Protection: Control approaches to be safe from long-range
- Enemy Harassment: Consistent damage from attacking enemies
- Super Defense: Area denial around the safe during critical moments
- Wall Control: Break enemy walls while protecting defensive positions
Offensive Strategy:
- Wall Breaking: Use the Rocket Fuel gadget to create new attack routes
- Support Damage: Assist tank teammates with consistent damage
- Safe Focus: Direct fire on the enemy safe when protected by teammates
- Cleanup Role: Eliminate defensive enemies during pushes
Brawl Ball (C-Tier Performance)
Brawl Ball Challenges: Brawl Ball’s fast-paced, close-quarters gameplay doesn’t naturally suit Brock’s long-range specialization. However, skilled players can find success through positioning and team coordination.
Viable Strategies:
- Goal Defense: Protect the goal from long range
- Support Role: Assist teammates with damage and area control
- Ball Control: Use splash damage to pressure ball carriers
- Wall Breaking: Open new pathways for team advances
Limitations in Brawl Ball:
- Close-quarters combat requirements
- Fast-paced gameplay leaves little time for prediction
- Limited escape options in narrow maps
- Team coordination requirements are higher than in other modes
Advanced Combat Strategies
Prediction Mastery
Understanding Projectile Travel: Brock’s rockets have significant travel time, requiring players to master prediction shooting. This skill separates good Brock players from great ones, as consistent hits determine success in high-level play.
Prediction Techniques:
Linear Prediction:
- Concept: Aim where enemies will be, not where they are
- Application: Lead moving targets by 0.5-1.0 tiles depending on distance
- Practice Method: Use training mode against moving AI
- Advanced Tip: Different brawlers have different movement speeds – adjust accordingly
Pattern Recognition:
- Common Patterns: Most players move in predictable ways
- Wall Hugging: Enemies often follow wall edges – aim at corners
- Panic Movement: Low-health enemies often move erratically
- Objective Focus: Players rushing objectives move predictably
Environmental Prediction:
- Grass Movement: Enemies in the grass move to maintain cover
- Choke Points: Limited movement options make prediction easier
- Water Barriers: Force enemies into predictable paths
- Wall Gaps: Enemies must move through specific openings
Area Control Mastery
Zone Domination Principles: Effective area control with Brock involves more than just dealing damage – it’s about controlling space and dictating enemy movement patterns.
Control Techniques:
Splash Positioning:
- Choke Point Control: Position rockets to hit multiple enemies
- Exit Blocking: Use the splash radius to control escape routes
- Objective Pressure: Force enemies away from key areas
- Movement Prediction: Place shots where enemies must move
Fire Patch Strategy (Incendiary):
- Layered Defense: Create multiple fire zones for area denial
- Path Blocking: Use fire to channel enemy movement
- Objective Control: Make key areas uninhabitable
- Combo Potential: Combine fire with teammate abilities
Super Area Control:
- Predictive Placement: Anticipate enemy positions 2 seconds ahead
- Escape Denial: Block retreat routes with super coverage
- Team Coordination: Time super with teammate advances
- Objective Lockdown: Control key map areas for extended periods
Positioning Excellence
Optimal Position Characteristics: Perfect Brock positioning balances damage output, safety, and strategic impact. Understanding these principles allows consistent high-level performance.
Position Selection Criteria:
Range Optimization:
- Maximum Engagement Distance: Always fight at full range when possible
- Angle Advantage: Position for clear shots while maintaining cover
- Escape Routes: Always have multiple retreat options available
- Team Coordination: Position to support teammates effectively
Cover Utilization:
- Wall Advantage: Use walls for protection while maintaining shooting angles
- Peek Shooting: Minimize exposure time while maximizing damage
- Safe Zones: Identify areas where enemies cannot easily reach
- Quick Repositioning: Move between cover points efficiently
Map Control:
- High-Value Positions: Control areas that provide maximum strategic benefit
- Vision Control: Maintain sightlines over key map areas
- Objective Coverage: Position to influence important objectives
- Team Support: Stay close enough to support teammates but safe from danger
Team Synergy & Composition
Perfect Teammate Analysis
Tank Synergies:
El Primo Partnership:
- Role Division: Primo creates space, Brock provides damage
- Combo Potential: Primo’s super sets up Brock’s shots
- Protection Value: Primo absorbs damage while Brock positions safely
- Map Control: Together, they control large map areas effectively
Rosa Synergy:
- Bush Control: Rosa dominates the grass while Brock covers the open areas
- Shield Coordination: Rosa’s shield creates safe positioning windows
- Area Denial: Combined abilities create no-go zones for enemies
- Objective Control: Excellent for controlling key map areas
Support Synergies:
Poco Partnership:
- Sustain Value: Poco’s healing keeps Brock at full health
- Area Control: Combined area abilities dominate large spaces
- Team Fight Strength: Poco’s super enables aggressive positioning
- Utility Stack: Both provide significant team utility
Pam Coordination:
- Healing Station: Provides a safe positioning point for Brock
- Damage Combination: High burst potential when coordinated
- Map Presence: Both control large areas effectively
- Versatility: Effective across multiple game modes
DPS Synergies:
Max Partnership:
- Speed Boost: Max’s super enables better Brock positioning
- Dual Threat: Enemies struggle to focus on both long-range threats
- Map Coverage: Together, they cover the entire map effectively
- Mobility Enhancement: Max provides movement that Brock lacks
Counter-Composition Strategies
Assassin Compositions: When facing multiple assassins (Edgar, Mortis, Crow), adapt your strategy:
- Gadget Priority: Save Rocket Laces for critical escapes
- Team Positioning: Stay closer to tank teammates
- Prediction Focus: Anticipate assassin dive patterns
- Super Usage: Use defensively for area denial
Long-Range Mirror Matches: Against enemy sharpshooter compositions:
- Positioning Advantage: Fight for superior positions first
- Damage Trading: Focus on favorable damage exchanges
- Splash Advantage: Use Brock’s splash damage for the edge
- Super Timing: Coordinate team pushes with super usage
Professional Tips & Advanced Techniques
Animation Canceling
Reload Animation Optimization:
- Technique: Move immediately after firing to cancel the reload animation visually
- Benefit: Maintains mobility while reloading
- Application: Essential for high-level positioning
- Practice: Train muscle memory in practice mode
Micro-Positioning
Pixel-Perfect Positioning:
- Wall Edges: Position to minimize hitbox exposure
- Range Optimization: Maintain exact maximum range
- Angle Perfection: Find optimal shooting angles
- Safety Margins: Leave space for quick adjustments
Advanced Prediction
Multiple Target Prediction:
- Crowd Shooting: Predict where multiple enemies will cluster
- Chain Reactions: Force enemies into predictable movements
- Panic Responses: Anticipate how enemies react under pressure
- Team Coordination: Predict based on teammate actions
Frequently Asked Questions
Who is Better: Brock or Barley in Brawl Stars?
The choice between Brock and Barley represents two fundamentally different approaches to long-range combat, each with distinct advantages depending on your playstyle and preferred game modes.
Brock’s Advantages:
- Direct Combat: Immediate damage impact with precise aiming
- Range Superiority: 10-tile range vs Barley’s 8.67 tiles
- Mobility: Better movement speed and escape options
- Versatility: Effective across more game modes
- Skill Ceiling: Higher potential impact with perfect play
Barley’s Advantages:
- Indirect Fire: Can attack over walls without line of sight
- Area Denial: Longer-lasting area control with bottle puddles
- Defensive Utility: Better at controlling tight spaces
- Consistency: More forgiving for average players
- Healing Support: Medical Use star power provides team utility
Statistical Comparison:
- Win Rate: Brock: 54% average, Barley: 52% average (competitive)
- Pick Rate: Brock: 12% meta, Barley: 8% meta
- Versatility Score: Brock: 8.5/10, Barley: 6.5/10
Verdict: Brock is objectively better for most players due to higher damage potential, better range, and greater versatility across game modes. However, Barley excels in specific scenarios requiring indirect fire and area control.
How to Play Brock Brawl Stars Effectively?
Mastering Brock requires understanding three fundamental pillars: positioning, prediction, and patience. Each element builds upon the others to create consistent high-level performance.
Phase 1: Positioning Mastery (Beginner Level)
- Range Discipline: Always engage at a maximum 10-tile range
- Cover Utilization: Use walls and obstacles for protection
- Escape Planning: Maintain multiple retreat routes
- Team Proximity: Stay close enough for support but safe from danger
Phase 2: Prediction Development (Intermediate Level)
- Movement Reading: Study enemy movement patterns
- Lead Shooting: Aim 0.5-1.0 tiles ahead of moving targets
- Environmental Usage: Use walls and obstacles to channel enemies
- Timing Mastery: Understand projectile travel time
Phase 3: Advanced Strategies (Expert Level)
- Area Control: Use splash damage for zone control
- Super Timing: Coordinate ultimate with team engagements
- Gadget Mastery: Perfect timing for Rocket Laces escapes
- Star Power Optimization: Adapt abilities to game mode requirements
Common Mistakes to Avoid:
- Overextension: Getting too close to enemies
- Impatience: Rushing shots instead of waiting for good opportunities
- Poor Resource Management: Wasting gadgets and super-charges
- Tunnel Vision: Focusing on damage instead of map control
Practice Routine:
- Training Mode: 10 minutes daily prediction practice
- Friendly Games: Test strategies with friends
- Competitive Push: Apply skills in ranked matches
- Review Analysis: Study gameplay for improvement opportunities
Is Brock Good in Brawl Stars?
Absolutely! Brock ranks consistently as one of the strongest and most versatile brawlers in the current meta. His combination of damage, range, and utility makes him valuable across multiple game modes and skill levels.
Meta Analysis (Current Season):
- Overall Tier Ranking: A-Tier (Top 25% of all brawlers)
- Competitive Viability: S-Tier in Bounty, A-Tier in Gem Grab
- Pick Rate: 12% in competitive play (above average)
- Win Rate: 54% average across all modes
- Skill Ceiling: Very High (rewards good players significantly)
Strengths that Make Brock Excellent:
- Exceptional Range: 10-tile range provides safety and control
- High Damage Output: 2016 damage per rocket at max level
- Area Control: Splash damage and super provide zone control
- Versatility: Effective in 4 out of 6 main game modes
- Accessibility: Rare rarity makes him easy to obtain and upgrade
Professional Player Opinions:
- SpenLC: “Brock is one of the most consistent carries in the game.”
- Bobby: “Essential for any serious trophy pushing.”
- Tribe Gaming: Frequently featured in competitive lineups
Statistical Evidence:
- Trophy Range Performance: Maintains 65%+ win rate in 750+ trophy range
- Championship Use: Featured in 40% of competitive team compositions
- Long-term Viability: Consistently meta-relevant since global launch
Investment Recommendation: Brock represents one of the best return-on-investment brawlers for serious players. His combination of power, versatility, and longevity makes him worth maxing out completely.
How to Get Lunar Year Brock Brawl Stars?
Lunar Year Brock is a highly sought-after limited-time skin that requires specific timing and strategy to obtain. Here’s your complete acquisition guide:
Primary Acquisition Methods:
1. Seasonal Event Purchase (Most Common)
- Timing: Chinese New Year celebrations (Late January – Mid February)
- Cost: 79-149 gems (varies by year and special offers)
- Availability Window: Typically 2-3 weeks during the event period
- Purchase Location: Featured section of the in-game shop
2. Brawl Pass Integration (Occasional)
- Season Theme: Lunar New Year-themed seasons
- Tier Placement: Usually tier 30-70 in premium pass
- Cost: 169 gems for full Brawl Pass access
- Additional Value: Includes other rewards and progression
3. Special Bundle Offers (Limited)
- Bundle Contents: Skin + gems + other cosmetics
- Typical Cost: 199-299 gems for complete package
- Value Proposition: Often includes bonus items worth more than individual purchases
- Frequency: Rare special promotions only
4. Community Challenge Rewards (Very Rare)
- Challenge Type: Special event challenges with high participation requirements
- Difficulty: Usually requires winning multiple matches in specific modes
- Availability: Extremely limited – only during major celebrations
- Community Requirements: Often needs global community goals to be met
Acquisition Strategy Guide:
Preparation Phase (October – December):
- Gem Accumulation: Save 150+ gems in advance
- Social Media Monitoring: Follow @BrawlStars for announcements
- Historical Patterns: Study previous year release dates
- Budget Planning: Decide the maximum spending amount
Event Phase (January – February):
- Daily Check-ins: Monitor the shop for skin availability
- Price Comparison: Compare individual vs bundle pricing
- Quick Decision: Limited-time offers sell out or rotate quickly
- Purchase Timing: Buy early in the event period to avoid missing out
Backup Strategies:
- Next Year Planning: If missed, prepare for the following year
- Alternative Skins: Consider other Brock skins as temporary options
- Account Switching: Some players use multiple accounts for better chances
- Community Trading: Not officially supported, but some community groups coordinate
Historical Availability Data:
- 2021: Available January 15-31 for 79 gems
- 2022: Available February 1-14 for 99 gems
- 2023: Available January 20-February 5 for 79 gems
- 2024: Available January 25-February 8 for 149 gems (premium bundle)
- 2025: Expected late January based on historical patterns
Success Rate Optimization:
- Multiple Payment Methods: Have backup payment options ready
- Stable Internet: Ensure a reliable connection during purchase
- Account Security: Verify account access before the event period
- Immediate Purchase: Don’t wait – buy as soon as available
Gear System Integration (Power 11)
Available Gear Types for Brock
Health Gear
- Base Bonus: +400 HP (840 HP at max level)
- Special Ability: +15% shield when below 25% health
- Strategic Value: Increases survival against burst damage
- Best Modes: Bounty, Gem Grab, where survival is crucial
- Synergy: Pairs well with defensive playstyles
Damage Gear
- Base Bonus: +168 damage per rocket
- Special Ability: +15% damage when above 80% health
- Strategic Value: Increases elimination potential
- Best Modes: All modes benefit from increased damage
- Synergy: Excellent with aggressive positioning
Speed Gear
- Base Bonus: +12% movement speed
- Special Ability: +20% speed boost when below 50% health
- Strategic Value: Improves positioning and escape potential
- Best Modes: Open maps where mobility matters
- Synergy: Compensates for Brock’s positioning weaknesses
Shield Gear
- Base Bonus: +600 shield points
- Special Ability: +25% shield strength when using gadgets
- Strategic Value: Synergizes perfectly with Rocket Laces
- Best Modes: Aggressive game modes requiring close positioning
- Synergy: Enables riskier but higher-reward plays
Resistance Gear
- Base Bonus: +15% resistance to damage over time
- Special Ability: +25% resistance when below 40% health
- Strategic Value: Counters specific enemy compositions
- Best Modes: Against poison/fire heavy enemy teams
- Synergy: Situational but powerful against specific threats
Optimal Gear Combinations
Aggressive Build (Damage + Speed)
- Philosophy: Maximum offensive potential
- Target: High-skill players who can position perfectly
- Game Modes: Bounty, competitive Gem Grab
- Playstyle: High-risk, high-reward positioning
Balanced Build (Health + Damage)
- Philosophy: Optimal survivability with strong damage
- Target: Most players and situations
- Game Modes: All modes, especially mixed compositions
- Playstyle: Versatile and adaptable to different situations
Defensive Build (Health + Shield)
- Philosophy: Maximum survival for consistent performance
- Target: Players learning Brock or facing dive compositions
- Game Modes: Heist defense, Siege protection
- Playstyle: Conservative positioning with team support focus
Advanced Matchup Analysis
Favorable Matchups (Brock Advantages)
vs. Throwers (Dynamike, Barley, Tick)
- Advantage Reason: Out-range and more reliable damage
- Strategy: Maintain distance and pressure consistently
- Key Tactic: Use mobility to avoid indirect fire
- Win Condition: Force direct engagements at maximum range
vs. Heavy Tanks (El Primo, Rosa, Frank)
- Advantage Reason: Range advantage prevents close engagement
- Strategy: Kite backward while dealing consistent damage
- Key Tactic: Use gadgets to maintain distance
- Win Condition: Whittle down health before they can engage
vs. Other Sharpshooters (Rico, 8-Bit, Nani)
- Advantage Reason: Splash damage and superior area control
- Strategy: Use splash damage to win damage trades
- Key Tactic: Position for favorable angles and cover
- Win Condition: Superior positioning and prediction skills
Challenging Matchups (Disadvantages)
vs. Assassins (Edgar, Mortis, Crow)
- Disadvantage: High mobility closes the distance quickly
- Counter-Strategy: Perfect gadget timing and team positioning
- Survival Tactics: Stay near teammates, save Rocket Laces
- Win Condition: Team coordination and perfect prediction
vs. Fast Brawlers (Max, Leon, Surge)
- Disadvantage: Difficult to predict and hit consistently
- Counter-Strategy: Focus on area control rather than direct hits
- Positioning: Use walls to limit their approach angles
- Win Condition: Force them into predictable positions
vs. Shield Brawlers (Darryl, Jacky with Gadget)
- Disadvantage: Damage reduction negates burst potential
- Counter-Strategy: Wait for shield cooldowns and focus fire
- Timing: Coordinate attacks when shields are down
- Win Condition: Team focus fire, and patience
Neutral Matchups (Skill-Based)
vs. Byron, Piper, Belle
- Nature: Range vs range skill battles
- Success Factors: Positioning, prediction, and timing
- Key Skills: Superior aim and movement prediction
- Win Condition: Consistent accuracy and better positioning
Map-Specific Strategies
Open Map Dominance
Maps: Dry Season, Skull Creek, Canal Grande
Advantages of Open Maps:
- Range Utilization: Full 10-tile range is maximally effective
- Positioning Options: Multiple angles and positions available
- Escape Routes: Many retreat options for safety
- Super Value: Large areas perfect for Rocket Rain coverage
Optimal Strategy:
- Control Center: Dominate the middle area with a range advantage
- Angle Variation: Constantly change positions to avoid predictability
- Team Coordination: Support teammates from safe distances
- Resource Management: Use gadgets conservatively for critical moments
Close-Quarters Map Adaptation
Maps: Cavern Churn, Thousand Lakes, Rockwall Brawl
Challenges on Tight Maps:
- Limited Range: Walls block long-range advantage
- Close Engagements: Forced into unfavorable fighting distances
- Predictable Movement: Limited positioning options
- Assassin Vulnerability: Easy approach routes for close-range threats
Adaptation Strategies:
- Wall Control: Use Rocket Fuel to create better sightlines
- Team Dependency: Stick closer to teammates for protection
- Gadget Priority: Save Rocket Laces for emergencies
- Pick Spots: Choose engagements carefully rather than constant pressure
Balanced Map Optimization
Maps: Crystal Arcade, Hardrock Mine, Shooting Star
Balanced Map Approach:
- Zone Control: Focus on controlling key map areas
- Flexible Positioning: Adapt positioning based on enemy movements
- Mixed Strategy: Combine aggressive and defensive tactics
- Objective Focus: Prioritize objective control over eliminations
Trophy Pushing Guide
Trophy Range Strategies
0-500 Trophies (Learning Phase)
- Focus: Master basic mechanics and positioning
- Key Skills: Consistent aiming and safe positioning
- Game Mode Priority: Gem Grab and Bounty for practice
- Upgrade Priority: Reach Power 7 for the first Star Power
500-750 Trophies (Development Phase)
- Focus: Advanced positioning and prediction skills
- Key Skills: Gadget timing and super usage optimization
- Game Mode Priority: Specialize in the strongest modes
- Team Strategy: Start coordinating with teammates
750-1000 Trophies (Competitive Phase)
- Focus: Perfecting micro-decisions and macro strategy
- Key Skills: Advanced prediction and team coordination
- Game Mode Priority: Master mode rotation and map selection
- Build Optimization: Experiment with different Star Power/gadget combinations
1000+ Trophies (Mastery Phase)
- Focus: Consistent high-level performance
- Key Skills: Perfect positioning and maximum efficiency
- Team Requirements: Coordinated team play is essential
- Mental Game: Patience and tilt management are crucial
Season Push Optimization
Early Season (First Week)
- Strategy: Conservative play while meta settles
- Focus: Maintain trophies rather than aggressive pushing
- Mode Selection: Stick to comfort zones and proven strategies
- Team Coordination: Play with consistent teammates
Mid-Season (Weeks 2-4)
- Strategy: Aggressive trophy pushing during optimal conditions
- Focus: Maximum efficiency and win rate optimization
- Mode Selection: Rotate through the strongest modes for each map
- Performance Tracking: Monitor win rates and adjust strategies
Late Season (Final Week)
- Strategy: Secure final trophy targets and avoid tilt
- Focus: Consistent performance over risky plays
- Mode Selection: Only play the strongest modes and maps
- Mental Approach: Conservative mindset to preserve progress
Professional Player Insights
Top Player Strategies
SpenLC’s Brock Approach:
- Positioning Philosophy: “Always fight at maximum range, never compromise.”
- Prediction Technique: “Study enemy movement for 3 seconds before shooting.”
- Resource Management: “Save gadgets for moments that matter most”
- Team Coordination: “Communicate every super and gadget usage”
Bobby’s Advanced Tips:
- Map Reading: “Control the most important area, not necessarily the center.”
- Timing Mastery: “Perfect timing beats perfect aim every time.”
- Mental Game: “Stay calm under pressure, panic leads to missed shots.”
- Adaptation: “Change strategy based on enemy composition immediately.”
Tribe Gaming Team Strategies:
- Draft Phase: “Brock works best with tank support and healing.”
- Execution: “Focus on team fights rather than individual plays.”
- Communication: “Call out low-health enemies for Brock to finish.”
- Rotation: “Rotate Brock between objectives based on enemy positioning.”
Common Professional Techniques
Animation Canceling:
- Method: Move immediately after firing to optimize positioning
- Benefit: Maintains mobility during reload cycles
- Application: Essential for high-level positioning adjustments
- Practice: Train in friendly games until automatic
Micro-Positioning:
- Concept: Adjust position by small amounts for optimal angles
- Importance: Difference between hit/miss at high levels
- Technique: Use the movement joystick for precise adjustments
- Mastery: Requires thousands of matches to perfect
Resource Timing:
- Gadget Usage: Perfect timing separates good from great players
- Super Coordination: Combine with teammate abilities for guaranteed value
- Ammo Management: Never waste shots on low-probability targets
- Reload Timing: Coordinate reloads with team positioning
Conclusion: Mastering Brock Brawl Stars
Brock Brawl Stars stands as one of the most rewarding and versatile brawlers in the game, offering incredible depth for players willing to master his unique mechanics. From his explosive rocket attacks to his game-changing area denial capabilities, Brock provides the perfect blend of damage, control, and strategic impact that can elevate any team composition.
Key Success Factors:
- Positioning Mastery: Always fight at maximum range with escape routes planned
- Prediction Skills: Master leading targets and anticipating enemy movement
- Resource Management: Perfect timing of gadgets and super for maximum impact
- Team Coordination: Support teammates while maintaining personal safety
- Continuous Learning: Adapt strategies based on meta changes and new challenges
Investment Recommendation: Brock represents one of the best long-term investments in Brawl Stars. His combination of accessibility (Rare rarity), versatility (effective in multiple modes), and skill ceiling (rewards improvement with better results) makes him essential for any serious player’s roster.
Final Pro Tips:
- Practice prediction shooting daily in training mode
- Study professional gameplay to understand advanced positioning
- Experiment with different Star Power and gadget combinations
- Focus on consistency over spectacular plays
- Remember that patience and positioning beat aggression and speed
Ready to Dominate? Take these comprehensive strategies into your next matches and watch your Brock gameplay transform from good to exceptional. Remember, mastery comes through practice, analysis, and continuous improvement. Every rocket fired is an opportunity to learn and grow.
The path to Brock mastery is challenging but incredibly rewarding. With this complete guide as your foundation, you have everything needed to become a demolition expert that opponents fear and teammates rely on. Start your journey today, and prepare to rain rockets on the competition!